How to Make a Wedding Crest
A wedding crest brings your names or initials together with a frame, flowers and personal symbols. Here’s how to turn those details into artwork you can use across your day.
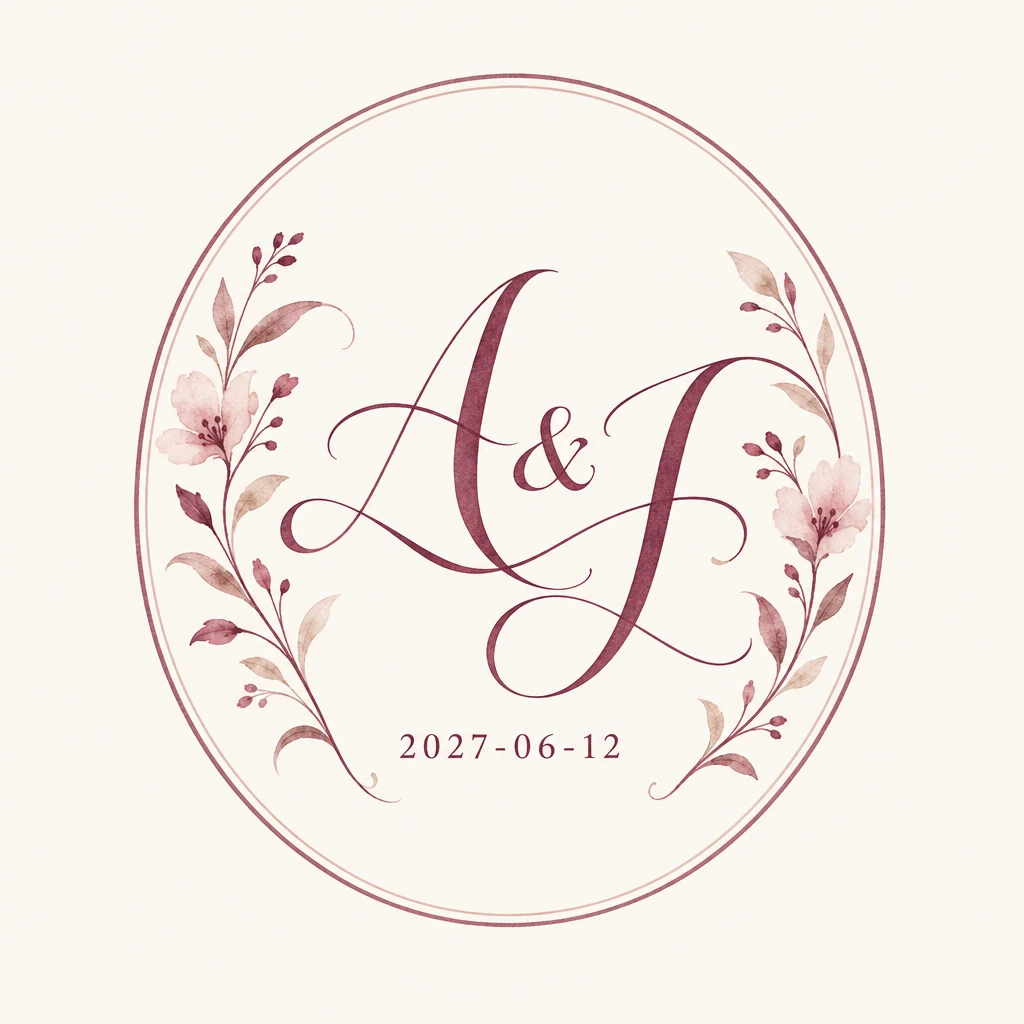
Start with a few meaningful choices.
You can arrange a crest yourself in a design editor, commission an illustrator, or use a wedding crest generator. This guide follows the AI route, then shows how to place the finished artwork in Canva.
For this example: A & J initials, a June 12, 2027 wedding date, botanical watercolor, an oval frame, and a berry, dusty rose and ivory palette.
Create your wedding crestOne free preview. No account or card needed. Preview allowances apply.
1. Choose the details that belong in your crest
Decide on your names or initials first. Initials leave more space for decorative lettering; full names give the artwork a more explicit introduction. Add a wedding date only if you want it to appear in the crest.
Pick one visual direction and two or three colors. A frame, a favorite flower and one personal symbol are a useful starting point. Too many competing elements can make a small crest difficult to read.
Browse wedding crest designs if you need a starting point: Garden Vows for floral inspiration, or Our Little Family for a pet-inspired direction.
2. Generate your first wedding crest preview
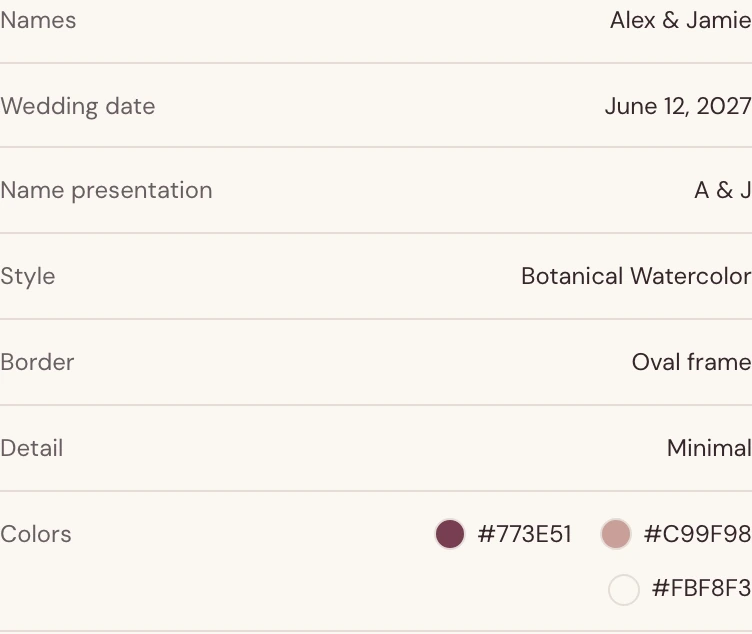
Open the wedding crest maker and work through Names, Style, Border, Palette, Details, Personal and Review. Enter both names, choose how the lettering should appear, and check the date before you generate.
Our example uses Initials &, Botanical Watercolor, an oval border and the colors #773E51, #C99F98 and #FBF8F3. The side image in the creator is a style reference; your personalized artwork appears after generation.
You can try one watermarked preview without an account. Generation depends on available capacity. If you leave after generating, use My designs in the same browser to return to the preview; sign in to save it to your account.
3. Check the names, date and small details
Read every letter and date digit, including separators such as the ampersand and date hyphens. Zoom in, then view the crest at the size you plan to use. Check that flowers and flourishes do not cover important lettering.
AI creates the artwork and lettering together. Names and dates are not editable text layers. If they are wrong, update the brief and generate a new design; that uses another preview. A described pet or place is an illustration, not a guaranteed likeness of an uploaded reference photo.
4. Save your crest and choose PNG or SVG
Sign in or register to save your completed design and download without the preview watermark. Open the design or find it in My designs, then choose a download format.
- PNG
- The saved raster artwork, including its background. A straightforward choice for placing the crest in a design editor or using it digitally. Enlarging it too far can reveal pixels.
- SVG
- A vector tracing of the saved artwork that scales without pixelation. It keeps lettering as shapes, not editable text, and does not automatically remove the background. Compare fine details with the PNG before printing.
Downloading does not use another preview. SVG preparation can take longer the first time; if it is unavailable, download PNG or retry. Creating and downloading are free for a limited time, within your preview allowance.
5. Use your wedding crest on a Canva invitation
To make a wedding crest in Canva from scratch, you would arrange initials, a frame and decorative elements yourself. To use the crest you just generated, upload the finished artwork instead:
- Start an invitation design. Choose a template or the dimensions your printer requests. Keep enough space for the event details around the crest.
- Upload the PNG. In the editor, open Uploads, choose Upload files and select your downloaded crest. Select the uploaded image to add it to the page. PNG is the simplest starting point; if you use SVG, check Canva’s current format and size requirements.
- Place and size the crest. Keep its proportions, try it above your names, and check readability at the intended size. The artwork includes a background, so choose a compatible invitation background or adjust the layout around it.
- Add the invitation text separately. Type the venue, time and RSVP details into Canva text boxes. These remain editable; the lettering inside the uploaded crest does not.
- Export for its intended use. PNG works for sharing an image digitally. For printing, choose PDF Print when appropriate, and follow your printer’s requirements for final size, bleed and crop marks. Inspect the exported file and request a proof before ordering a full set.
Putting a PNG inside a PDF does not turn it into vector artwork or restore lost detail. SVG can help with scaling, but a file extension alone does not establish print quality.
Canva’s instructions: upload media, supported formats, and margins, bleed and crop marks. Available options can vary by design and plan.